Have you ever visited a website only to be met with a red triangle and a warning that the site was not safe? When you see that warning, chances are you instinctively just hit the back button and moved on to another site. For example, my personal blog site had an SSL error that I was unaware of for a a few weeks (because I usually ignore system emails for my own site), and it cut my blog traffic by 93%! For many ‘tech savvy’ types that chance across this post, it’s a no brainer. But I come across churches every single week that do not have a valid certificate, mostly through just not really knowing the why, what or how.
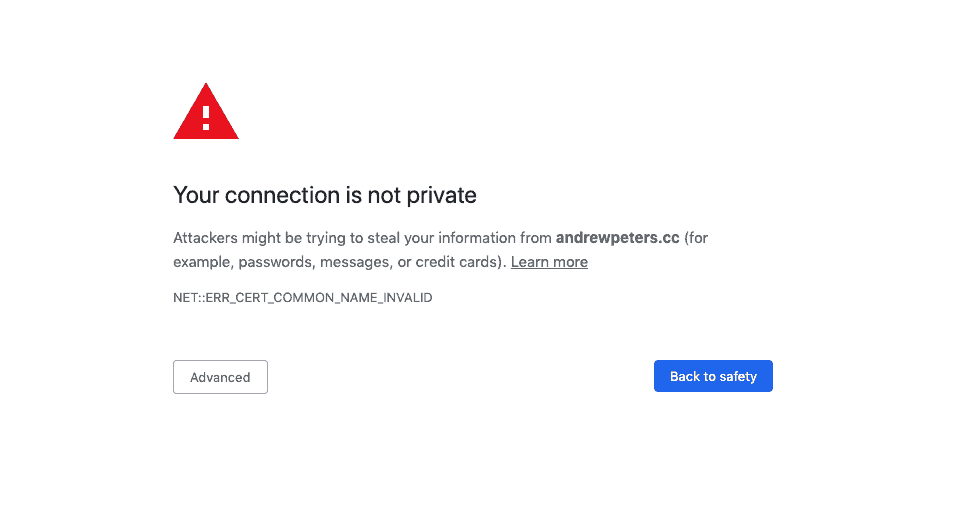
In the past number of years search engines and browsers alike have been cracking down on sites that don’t have a valid SSL (think a website that has a lock and starts with https instead of http). What are the reasons your
In this post we are going to take a look at some basic reasons for having a valid SSL certificate as well as how to install one and get it running quickly!
What is an SSL and how do they work?
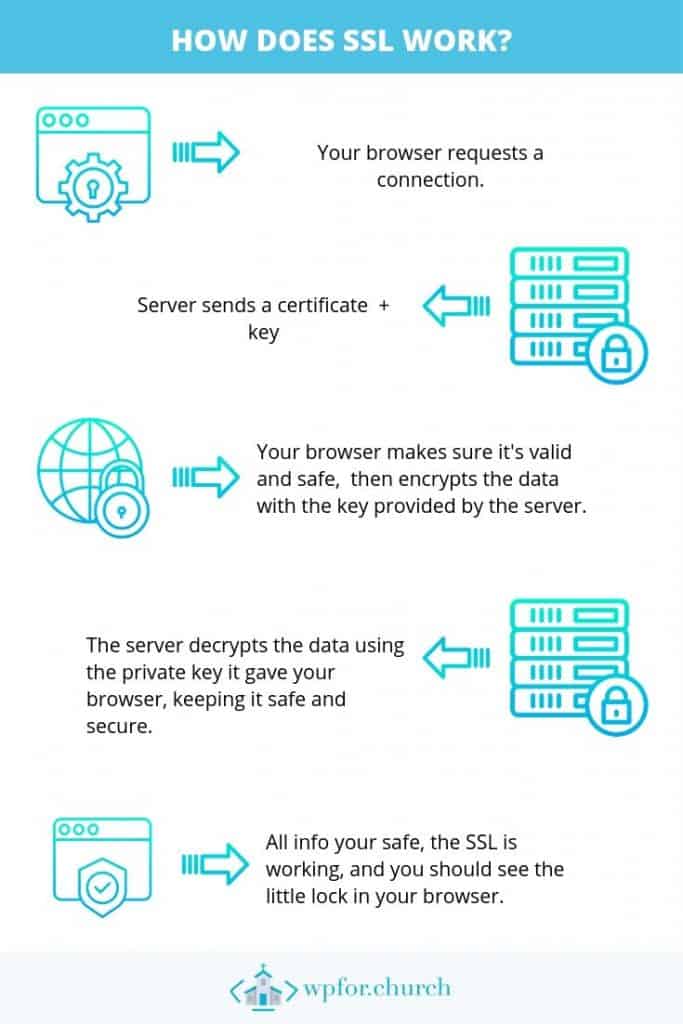
An SSL is an abbreviation for Secure Socket Layers, and in a nutshell they encrypt and secure information exchange between a computer and the server your site is on, provide certificate information and assures users of the website that their info is secure.
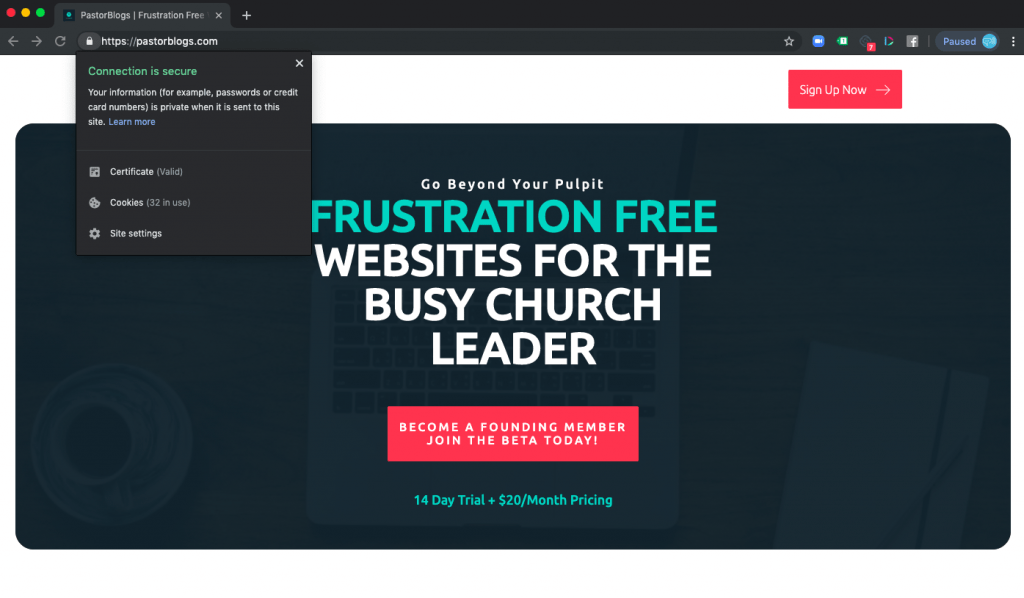
In most web browsers, users can click on the ‘lock’ icon displayed in the address bar to view information about this sites SSL jargon.
The SSL is use to pass encrypted data between your browser and the server of whatever website you’re looking at. Basically you visit a site, a server gives your browser a key to use, your browser locks down your content with a key before sending it to the server to use, and then the server decrypts it with that same key, thus securing your content in between your browser and the w
Why does your church need an SSL?
SSL is just ‘good business’ for most sites. Aren’t you glad that when you buy something on Amazon that your site is secure and that no one can get your card info? But why do you need one for your church? I think there are a few main reasons.
- Google penalizes sites that aren’t SSL. Your rankings and SEO are affected.
- Browsers warn users and advise them to leave. So you’re missing out on tons of visitors.
- You need to secure any form data or giving data your site uses.
- Mitigates MITM attacks and keeps your site secure from getting hijacked.
Google will penalize you if you don’t have SSL.
In the summer of 2018 Google announced a plan to improve web security on the whole by encouraging websites to switch from HTTP to HTTPS by adding an SSL certificate.
A huge part of this announcement was Google saying that websites with SSL will see SEO benefits and higher rankings, which also entails that websites that do not have SSL will be hurt because of it.
If your church doesn’t have a valid certificate, then right now people are missing out on being found through Google search.
Most browsers will encourage users to leave your site.
As part of Google’s plan, the popular Chrome browser began marking all websites without a SSL certificate as “Not Secure” starting July 2018.
Many other popular browsers have followed suit and now throw up a ‘warning’ screen when a valid SSL is not found. This is cutting down on the number of people that actually go through the warning wall and visit your church’s website.
When potential visitors see this notice, it gives them a bad impression for your church just like it would any other business or organization.
You need to secure form data and payments.
Do you have contact forms on your website? Maybe you have event registrations or ‘first time guest’ forms?
SSL makes sure that it is secure and that when people give you their information they are sure that it is safe.
Most people today will use a dedicated ChMS or Giving Solution. They are secured on their own. In most cases, even the embedded forms you might add to your giving page are secured and never touch your website’s server, but can you really expect potential donors to think ‘well, this website isn’t secure, but I’m sure this embed from tithe.ly is?’ No, they just won’t give. SSL subtly assures donors that you’re squared away.
Aids in keeping your site safe from MITM attacks.
MITM, or Man in the Middle, attacks occur when some jerk that is good at computer stuff is sitting on the connection in between your users computer and your website’s server. Essentially, they attempt to hijack the communication lines between the server and the user.
There’s a lot of reasons hackers would do this, but probably the main one that would affect your site is hijacking communications to inject their own stuff and infect your site with malicious junk and kidnapping your links and such to go where the hacker wants.
Still, and SSL isn’t fool proof in preventing this kind of attack, though it can aid in mitigating your vulnerability. We recommend you always have some type of WAF Firewall on the server side as well as a security plugin on the WP side (like Wordfence or iThemes Security) unless your hosting company is already huge on security. This will do more to prevent malware and having a compromised site. In my experience, while these tools are great, most of the infected sites I’ve seen are from human error and someone exploiting a badly coded plugin.
How do I get and install an SSL?
Many people haven’t done this because our idea of the inter-webs is stuck in 2009. Back then you have to pay a solid SSL certificate, then install it in your hosting environment, then make sure all the content on your site is switched over to HTTPS. It was a pain, and since Google was’t cracking the whip, many people weren’t worried about it. In recent years it has gotten increasingly easier to secure your site with an SSL. Most can be implemented in just a few short steps.
1. Install a certificate from your website’s host.
Every good host nowadays offer Free SSL directly from your hosting environment. For example, in my hosting environment after I add a new site, I just go to the Let’s Encrypt SSL option and add my SSL. Many other hosts let you do it with the click of a button for absolutely free.
By and large, most of these certificates will be served through a free service called Let’s Encrypt.
2. Install the Really Simple SSL Plugin
Now that your site has an SSL certificate, we need to make sure that your WordPress site is showing all the secure content. Otherwise, you’ll have the certificate, but many elements (like images for example) will still be using their http versions. It is possible to do all this manually, but it’s a real pain, especially for non-techies.
First, you’ll need to install the Really Simple SSL plugin. If you don’t know how to install plugins, you can watch an older tutorial we have here.
After activation, you will need to visit Settings » SSL page. The plugin will automatically detect your SSL certificate, and it will set up your WordPress site to use HTTPs.
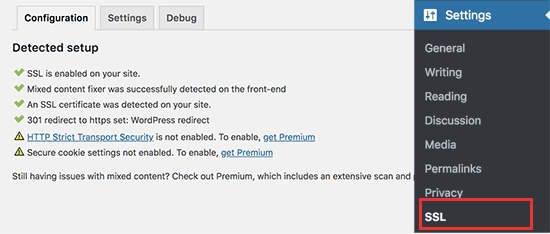
Really Simple SSL will take care of everything including the mixed content errors. Here is what the plugin is doing behind the scenes:
- Checking for valid SSL certificate
- Set WordPress to use https in URLs
- Set up redirects from HTTP to HTTPs
- Look for URLs in your content still loading from insecure HTTP sources and attempt to fix them.
While the plugin says you can remove it and be ok, I typically leave it as removing it after use can sometimes result in ‘mixed content’ errors showing up. Pro Tip: Make sure the 301 redirect to https option is set. Sometimes this does not happen automatically and won’t tell browsers to force https when an old web URL or link is written with http.
3. Check that your site is secure
After adding SSL and then securing with Really Simple SSL everything is usually A-ok and ready to go! Still, I like to check for any errors, so I use one of these two sites to check for errors and mixed content.
https://www.jitbit.com/sslcheck/
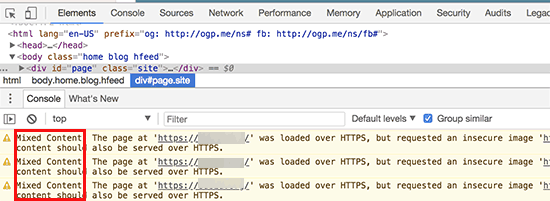
A mixed content error is when your site is using https but the some of the content your site is showing still has an http address. If you have mixed content, you can add the Better Search and Replace plugin, and replace http://yoursite.com with https://yoursite.com. This will update all the relevant URL’s on your website. We should probably make a tut on this huh? For now, check out this great post from Kinsta.
4. Submit your newly secured website to Google!
So, now we’ve gone from your hosting, to your site, and finally to Google! Search engines like Google consider https and http as two different websites. This means you will need to let Google know that your website has moved to avoid any SEO issues. The new version of search console has begun to group them together, but it’s definitely important to make sure that it at least has the https version!
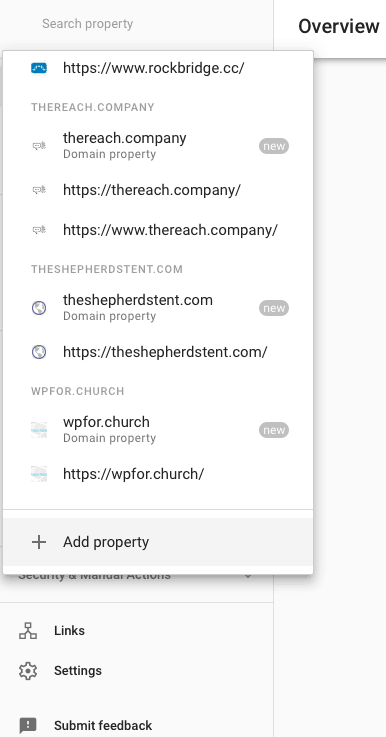
To do that, you just need to go to your Google Search Console account and click on ‘Add a Property’ button. If it’s your first time using Search Console, you’ll have to verify ownership of your site. It’s a pretty straightforward process, and if you are already using Google Analytics or Google Domains it’s even easier.
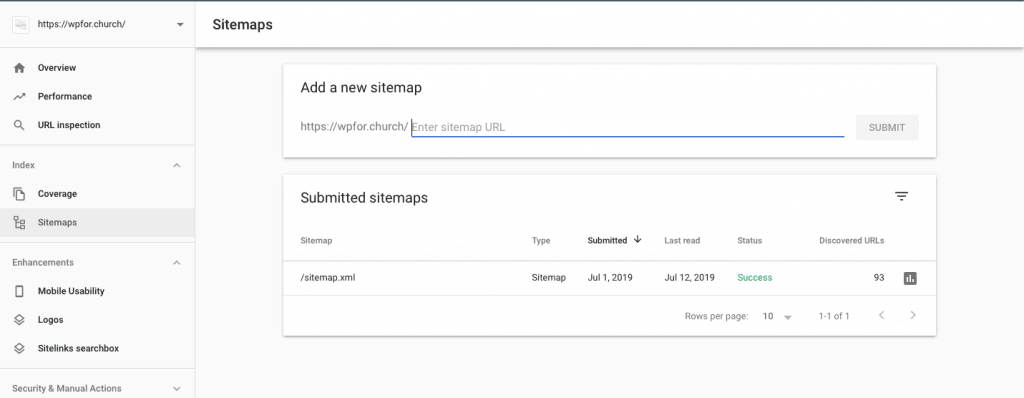
Add the property, and submit a sitemap. If you’re using an SEO plugin such as SEO Framework (my personal fave) or Yoast (what most people tend to use), you can find that link in the plugin settings area.
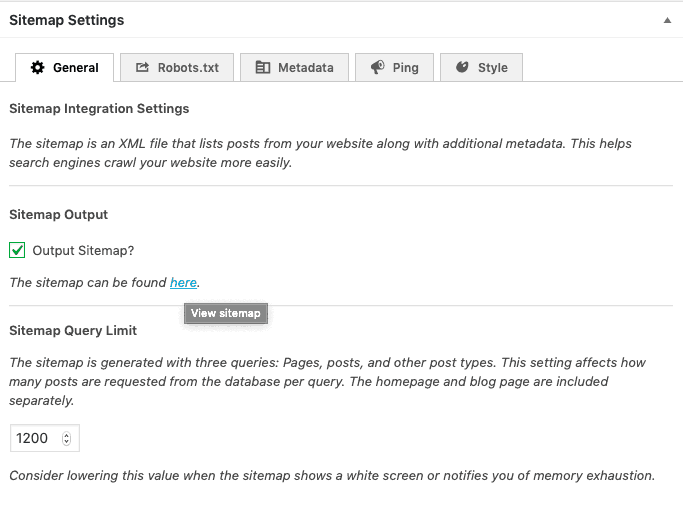
In SEO Framework for example, I just click SEO and scroll down towards the bottom till I see the SiteMap tab. Copy the ‘the sitemap can be found here’ link. Basically it adds /sitemap.xml to your domain name. So the sitemap for this website is just https://wpfor.church/sitemap.xml. I take the sitemap.xml piece over to search console.
With the tail end of the sitemap URL copied I click ‘Sitemaps’ in the left side bar in Search Console, paste in the part of the URL you copied, and click Submit.
By and large, if your church has a website, you need to make sure you have a valid SSL certificate. Just my personal blog site chased away 93% of my usual traffic in one month of letting my SSL slip through the cracks!
I hope following these steps and connecting with your host to get the SSL installed correctly goes smooth for you! If you find you’re still having trouble, shoot us an email or comment below and let’s see how we can work together to get your site secure!
Hey guys! I am a church leadership and creative guy living in the Atlanta area with my awesome wife and two kiddos. I've worked on staff with a number of churches as well as traveled full time as a conference speaker. Now, I work full time at The Reach Company helping ministries and businesses tell their story and make an impact online.
Latest Posts
Make your church website shine!.
Join our mailing lists to get tool reviews, helpful tutorials, and WP deals right in your inbox.
Make Your Church Shine!
Our goal is to help church leaders and volunteers get the most out of their WordPress site. Join our mailing list to get all the new WordPress Tools & Tuts (and the occasional WordPress deal) right in your inbox!


